For many homeowners, the laundry room is an afterthought—a dark corner of the basement or a cramped closet where chores feel like a chore. But a well-planned laundry room, designed with smart ergonomics, rugged materials, and the right mechanical bones, can completely change the rhythm of your household. Whether you are remodeling an existing space or building from scratch, treating this room as a high-functioning workspace is the key to long-term satisfaction.
Here is how to design a laundry room that is safe, efficient, and actually pleasant to use.
The Great Placement Debate: Upstairs vs. Downstairs
The first decision in any laundry room design is where to put it. In older homes, washers and dryers were almost always relegated to the basement. Today, there is a strong trend toward putting the laundry room on the second floor, closer to the bedrooms where dirty clothes actually accumulate.
Each location comes with a distinct set of trade-offs that you must plan for during the design phase.
- The Second-Floor Laundry: The primary benefit is convenience. You eliminate the need to lug heavy baskets up and down stairs. However, second-floor installations carry two major risks: vibration noise and water damage. Modern washing machines spin at incredibly high speeds, which can vibrate the joists of a house and create a low, rumbling hum in adjacent bedrooms. More importantly, a washing machine leak on the second floor can ruin the ceilings, walls, and flooring of the rooms directly below it.
- The First-Floor or Basement Laundry: These locations are structurally safer because a leak is less catastrophic, and concrete floors easily absorb machine vibrations. The downside, of course, is the daily trek up and down the stairs with heavy loads of linens.
If you choose a second-floor or main-floor installation, you must design for worst-case scenarios.
First, install a heavy-duty plastic or metal drain pan beneath the washing machine. This pan must be piped directly to a waste drain or to the home’s exterior so that slow leaks are safely channeled away. Second, install an automatic shutoff valve. These smart valves sense water on the floor or unusual pressure drops in the hoses and instantly shut off the water supply to the machine. Finally, look into anti-vibration pads for the machine feet to keep noise from transferring through the floor framing.
Machine Layout: Side-by-Side vs. Stacked
How you arrange your washer and dryer dictates the entire layout of the room. You have two main directions to go: horizontal or vertical.
| Feature | Side-by-Side Configuration | Stacked Configuration |
|---|---|---|
| Best For | Large rooms, multi-functional spaces | Tight spaces, closets, utility rooms |
| Counter Space | Excellent; allows for a continuous top surface | None directly on top of the units |
| Ergonomics | Less reaching up, but requires bending down | Easy to reach the dryer; requires bending for washer |
| Storage Capacity | Plenty of wall space above the units | Saves floor space for tall closets or cabinets elsewhere |
Side-by-Side Machines
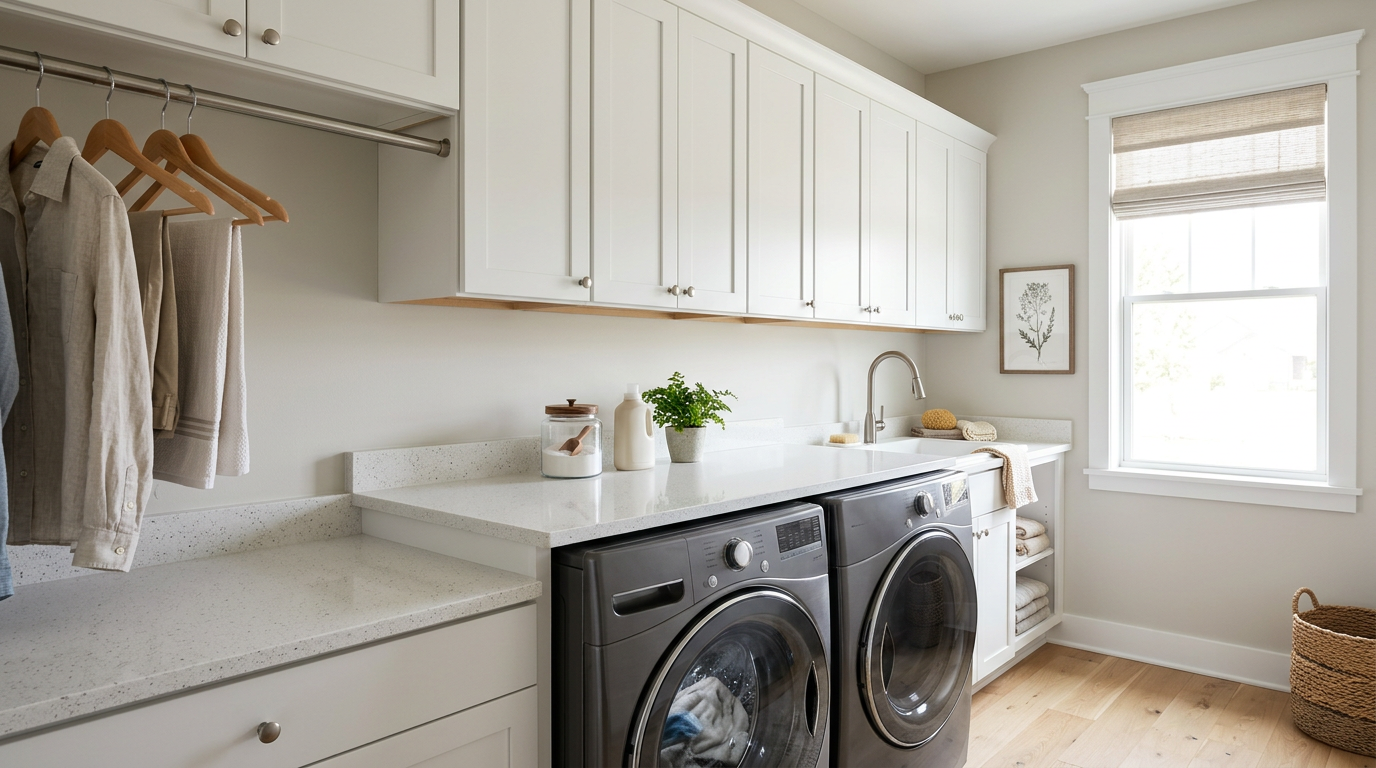
This traditional setup is popular for a reason. Placing the units side-by-side allows you to install a continuous, full-depth folding counter directly over the machines. This creates a massive workspace at a comfortable standing height. If you choose this layout, front-loading machines are essential; top-loaders prevent you from installing a counter above them.
Stacked Machines
Stacking your dryer on top of your washer is the ultimate space-saver. This is the ideal choice for small utility closets or narrow rooms. It frees up valuable floor space for a laundry sink, a broom closet, or a folding table. Keep in mind that stacking requires a front-loading washer, and the controls on the top unit may be difficult to reach for shorter family members.
Key Work Zones and Built-In Features
A successful laundry room behaves like a commercial kitchen: every task should have a dedicated zone. When you trace the path of a basket of dirty clothes, it should flow naturally from sorting to washing, drying, hanging, and folding without you having to take unnecessary steps.
The Full-Depth Folding Counter
If space permits, a deep countertop is one of the best upgrades you can make. Standard kitchen counters are 24 inches deep, but laundry appliances are often 28 to 32 inches deep. To cover them completely and give yourself ample room to fold sheets and towels, aim for a custom-depth counter of 30 to 34 inches. Quartz, solid surface, or sealed butcher block are excellent material choices that can handle damp clothes without warping or staining.
The Utility Sink
Never underestimate the value of a deep utility sink. From soaking stained sports uniforms and hand-washing delicates to filling mop buckets and washing paintbrushes, a sink keeps messier tasks out of the kitchen. Look for a deep-basin sink (at least 10 to 12 inches deep) made of durable stainless steel or heavy-duty composite. Install a high-arc faucet with a pull-down sprayer for maximum utility.
Hanging Rods and Drip-Dry Zones
Not everything can go into the dryer. You need a dedicated place to air-dry sweaters, activewear, and button-up shirts. A simple closet rod installed between two upper cabinets—or a fold-down drying rack mounted to the wall—provides a clean place to hang wet clothes. Position this zone near your utility sink or over a waterproof floor so dripping water doesn’t damage wood cabinetry.
Smart Storage: Cabinets, Shelves, and the Broom Closet
To keep your laundry room looking clean, you need a mix of open and closed storage:
- Upper Cabinets: These are perfect for keeping laundry detergents, stain removers, and bleach safely out of reach of children and pets.
- Open Shelving: Use shallow open shelves for items you reach for constantly, like dryer balls or clean folded hand towels.
- The Broom Closet: Dedicate one tall, narrow cabinet to utility storage. This is the perfect spot to stash your ironing board, vacuum cleaner, brooms, and steam irons, keeping them of out of sight but easily accessible.
Flooring: Preparing for the Inevitable Leak
In a laundry room, it is not a question of if a water spill or leak will happen, but when. The flooring you choose must be completely waterproof and structurally prepared for moisture.
Tile vs. Luxury Vinyl Plank (LVP)
Traditional porcelain or ceramic tile is the gold standard for laundry floors. It is completely waterproof, easy to clean, and highly resistant to dents from heavy appliances. If you choose tile, opt for a textured finish to prevent slips when the floor is wet, and use a stain-resistant grout.
Luxury Vinyl Plank (LVP) is another excellent, budget-friendly option. It is soft and warm underfoot, entirely waterproof, and handles vibrations well. Whichever material you choose, always install a high-quality waterproof underlayment beneath the flooring to ensure that any water that gets past the seams cannot penetrate the subfloor and rot the wood framing.
The Floor Drain
If you are building new or doing a bottom-up studs-out remodel, look into installing a central floor drain. The floor is sloped gently toward a low point where the drain sits. In the event of a catastrophic hose failure or a backed-up sewer line, the water flows directly into the drain instead of flooding your home. It is a small structural addition that offers immense peace of mind.
Mechanicals, Ventilation, and Plumbing
The prettiest laundry room in the world will fail if the utilities behind the drywall are not up to par. Because these rooms handle high heat, heavy water loads, and significant electrical draws, the mechanical specifications must be treated with precision.
[Washer] ---------> Requires: 120V Dedicated Circuit + Hot/Cold Water + Drain Line
[Electric Dryer] --> Requires: 240V Dedicated Circuit + Heavy-Duty Exhaust Vent
[Gas Dryer] ------> Requires: 120V Standard Circuit + Gas Line + Exhaust Vent
Ventilation Done Right
A clothes dryer expels a massive amount of hot, moisture-laden air. If this air isn't vented properly, it can cause mold growth inside your walls.
- Use Rigid Metal Ductwork: Never use flexible foil or plastic transition ducts behind walls. They compress easily, collect lint, and are a major fire hazard. Always use rigid aluminum or galvanized steel ducting.
- Keep Runs Short and Straight: Every turn in a vent pipe slows down airflow and creates a spot for lint to accumulate. Design your laundry room so the dryer is as close to an exterior wall as possible. Keep the run under 25 feet, and subtract 5 feet of allowable length for every 90-degree elbow you install.
Electrical and Gas Requirements
Before ordering appliances, make sure your utility lines match your machines.
- Electrical Dryers: These require a dedicated 240-volt outlet. If you are planning a remodel, check your main service panel to ensure you have the capacity for this heavy draw.
- Gas Dryers: These run on standard 120-volt power but require a dedicated gas supply line. Gas dryers are highly efficient, but they must be installed and tested by a licensed plumber.
- The Washers: Your washing machine needs a dedicated 120-volt, 20-amp circuit. Designing the room with its own dedicated circuits ensures you won't trip a breaker if you run the vacuum cleaner and the washing machine at the same time.
Designing a laundry room that balances daily workflow with robust mechanical engineering takes careful planning. If you are ready to transform your utility space into an organized, stress-free zone that works beautifully for your family, we would love to help. Contact the team at Modern Builders of America today to schedule a free in-home estimate and discuss your remodeling goals.