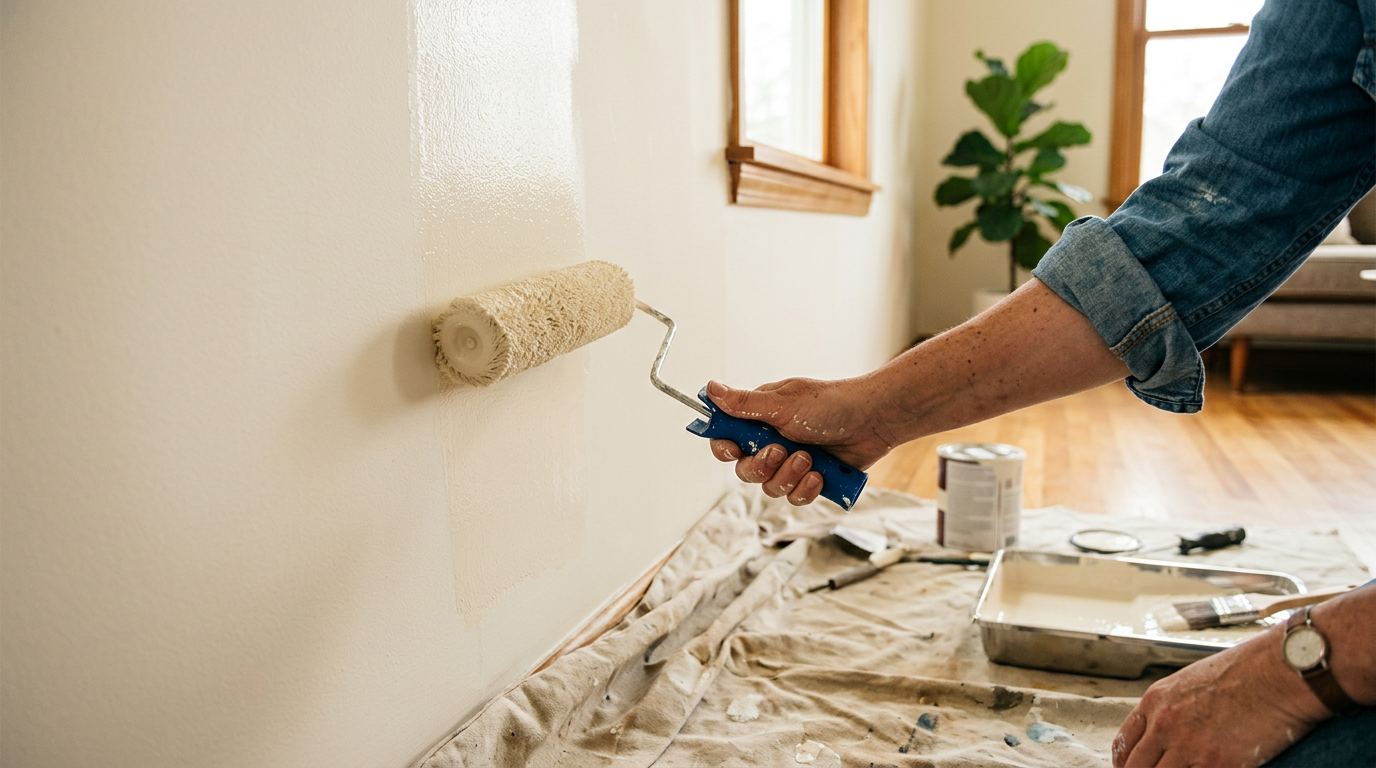
If you have ever watched a professional paint crew work, you might have noticed something frustrating: they spend eighty percent of their time doing everything except holding a paintbrush or a roller. They are washing walls, scraping old flakes, filling tiny holes, and taping off trim. It looks tedious, but there is a reason for this. In the world of high-end residential remodeling, we have a saying: a great paint job is ninety percent preparation and ten percent application.
When you rush a paint job, the failure doesn’t usually show up on day one. It shows up six months later when the paint begins to bubble near a bathroom shower, peel off a baseboard, or show ugly roller marks every time the afternoon sun hits the wall. Understanding how paint actually works—from the chemistry of the bond to the science of drying—is the only way to get a finish that looks flawless and lasts for a decade.
The Foundation: Why Preparation is Non-Negotiable
Paint is not glue. It cannot bridge gaps, hide structural cracks, or stick to dirt. If you apply high-quality paint over a dirty or unstable surface, the paint will adhere to the dust or oil instead of the wall, leading to premature peeling.
Cleaning and Degreasing
Before a single drop of paint is mixed, every surface must be clean. In kitchens, this is particularly critical. Cooking oils and grease aerosolize and settle on walls, cabinets, and trim. Even in living rooms, hand oils accumulate around light switches and door frames.
- The Process: We use a mild detergent or a trisodium phosphate (TSP) substitute to wash these areas down. TSP cuts through heavy grease and dulls glossy finishes slightly, giving the new paint a better surface to grip.
- Rinsing: Any cleaning agent used must be thoroughly rinsed with clean water. Leftover soap residue can prevent the paint from bonding just as effectively as the grease itself.
Patching and Caulking
Once clean, the surfaces must be made structurally sound.
- Patching: Hairline cracks in plaster, nail pops in drywall, and dings in wood trim require different patching compounds. For drywall, a lightweight joint compound works best. For wood trim, we use a high-quality wood filler or a two-part epoxy patch that won't shrink over time.
- Caulking: Gaps between walls and baseboards, or where crown molding meets the ceiling, must be filled with a premium elastomeric acrylic latex caulk. This type of caulk remains flexible, allowing the house to naturally expand and contract with seasonal temperature changes without cracking the paint line.
The Science of Sanding
Sanding is not just about making a surface feel smooth to your hand; it is about creating a "mechanical bond."
+------------------------------------+
|  Smooth Surface (No Grip)         |
|  ================================  | ---> Paint can easily peel or slide
|                                    |
+------------------------------------+
|  Sanded Surface (Mechanical Key)   |
|  vvvvvvvvvvvvvvvvvvvvvvvvvvvvvvvv  | ---> Paint locks into microscopic grooves
|                                    |
+------------------------------------+
Drywall mud, bare wood, and old paint are relatively slick. By sanding them with fine-grit sandpaper (typically 120- to 220-grit), you create microscopic scratches. The new coat of paint flows into these tiny grooves, locking itself to the substrate like a series of interlocking puzzle pieces. Without this mechanical key, the paint simply sits on top of the surface, highly vulnerable to scraping and chipping.
When to Etch: Preparing Glossy and Slick Surfaces
Some surfaces are too hard or slick for standard sanding to be effective. Kitchen cabinets finished in factory baked-on enamel, metal doors, glass, tile, or trim previously painted with glossy oil-based paint require an extra step to ensure adhesion.
For these challenging surfaces, we use chemical etching or specialized liquid deglossers (often called "liquid sandpaper"). These chemical formulas eat away the microscopic top layer of the glossy finish, leaving behind a matte texture that is highly receptive to primer. When working with metal or exterior surfaces, chemical etching removes oxidation and rust, ensuring the protective primer can seal the metal from moisture.
Understanding Primers: Choosing the Right Anchor
Many homeowners view primer as just "cheap white paint" used to cover dark colors. In reality, primer is a completely different chemical formulation designed to solve specific structural problems. While paint is formulated for color, washability, and UV resistance, primer is formulated to stick, seal, and block.
| Primer Type | Best Used For | Key Benefit |
|---|---|---|
| Standard Latex | New drywall, minor color transitions | Evens out porosity between drywall mud and paper |
| Stain-Blocking (Alkyd/Oil) | Water stains, smoke damage, tannin bleed on wood | Seals water-soluble stains so they don't bleed through |
| Shellac-Based | Severe smoke damage, pet odors, knotty pine | Absolute barrier for smells and sap; dries incredibly fast |
| Bonding Primer | Glass, tile, glazed laminate, metal, glossy cabinets | Sticks to slick surfaces where normal paint would peel |
When is Primer Mandatory?
You should never skip primer in the following scenarios:
- Bare Drywall: Unpainted drywall paper and joint compound absorb paint at completely different rates. If you paint directly over bare drywall, the areas with joint compound will look dull and sucked-out (a phenomenon called "flashing"). Primer seals the surface so the topcoat dries uniformly.
- Dramatically Changing Colors: Going from deep charcoal to soft cream requires a primer. Using a high-hide white primer is far more cost-effective than applying four or five coats of expensive finish paint.
- Stained Areas: Water spots, rust, soot, or ink will bleed through standard latex paint forever. An oil- or shellac-based stain-blocking primer is required to chemically lock those stains down.
- Wood with Heavy Tannins: Woods like redwood, cedar, and oak contain natural oils called tannins. If you paint them with water-based paint without a specialty primer, these tannins will bleed through, leaving ugly yellow-brown stains on your new paint.
Mastering Wall Textures on Patches
One of the easiest ways to spot an amateur paint job is a "bald patch" on a textured wall. If you patch a hole in a wall that has an orange peel texture, and you simply paint over the smooth patch, that flat spot will catch the light and stand out from across the room.
Drywall Textures at a Glance:
- Orange Peel: Tiny, bumpy dimples resembling an orange skin.
- Knockdown: Flat-topped splatters with a rustic, Mediterranean feel.
- Skip-Trowel: Hand-applied plaster look with subtle, sweeping skips.
- Smooth: Flawless, flat surface requiring impeccable skim-coating.
To make a repair invisible, the professional crew must replicate the surrounding texture before priming. We use specialized texture spray cans, hopper guns, or hand-trowel techniques to match the exact density and height of the existing wall pattern. Once the texture is applied, it must dry thoroughly, be lightly sanded to knock down any sharp peaks, and then primed before the final wall color is rolled on.
The Chemistry of Drying: Dry, Recoat, and Cure Times
One of the most common mistakes DIYers and rushed contractors make is ignoring the clock. Modern latex paints dry quickly to the touch, which tempts people to apply the second coat too soon. To prevent major paint failures, you must understand the three distinct phases of the drying cycle.
- Dry to the Touch: Typically occurs within 1 to 2 hours. The water or solvent in the paint has evaporated from the surface, making it feel dry when you lightly run your hand over it. However, the paint film underneath is still wet and soft.
- Recoat Time: Typically 4 to 6 hours for latex paints, and up to 24 hours for oil-based products. This is the minimum amount of time required for the paint layer to release enough vapor and tighten up so that applying a fresh, wet coat of paint won't tear or soften the first coat.
- Cure Time: Typically 21 to 30 days. This is the chemistry milestone. During curing, the paint resins chemically cross-link and fuse into a continuous, hardened defensive sheet.
If you rush the recoat time, you trap moisture and solvents between the paint layers. This leads to peeling (the paint lifts off in sheets), flashing (uneven sheen and dull spots), and a permanent loss of color depth because the pigments cannot settle correctly. Furthermore, if you wash or scrub a wall before the full 30-day cure cycle is complete, you will likely burnish the finish, leaving a permanent shiny spot.
Comparing the Brands: Resin Quality and Pigment Load
Not all paints are created equal, and in our industry, you truly get what you pay for. The price difference between a cheap retail jug of paint and a premium architectural coating comes down to two main ingredients: resins (the binders that hold the paint together) and pigments (the solids that provide color and coverage).
Premium paints use 100% acrylic resins that dry harder, resist fading from UV light, and stretch slightly instead of cracking. They also have a higher percentage of solids (pigments) by volume, meaning you need fewer coats to achieve a rich, deep color.
Sherwin-Williams: Emerald vs. Duration
- Emerald: This is their top-tier interior and exterior line. It offers unparalleled washability, resistance to water spotting, and a very smooth, self-leveling finish. It is highly resistant to color rub-off when scrubbed.
- Duration: Slightly thicker than Emerald, Duration is an absolute workhorse, especially for exterior applications. It goes on thick, hides minor imperfections well, and is exceptionally flexible, making cracking and peeling rare.
Benjamin Moore: Aura vs. Regal Select
- Aura: Regarded by many designers as the pinnacle of color depth. It uses a proprietary Color Lock technology where the pigment is chemically bound to the resin. It is incredibly rich, handles dark colors beautifully without tracking, and has self-priming properties.
- Regal Select: A staple for professional painters for decades. It is highly durable, easy to apply, holds its sheen consistently, and cleans up beautifully. It is an excellent balance of premium performance and ease of use.
Other Notable Players
- Behr Marquee: Known for its high hide and impressive one-coat coverage guarantees in certain colors. It has a high pigment load, though some professionals find it dries so fast that it can be harder to maintain a wet edge on large walls.
- Dunn-Edwards: A regional favorite in the Southwest, specifically formulated to withstand intense heat and UV rays. Their premium lines resist chalking and fading better than national brands in desert climates.
Choosing the right paint isn't just about picking a color card from a display rack. It requires analyzing the lighting in your home, the moisture levels of the room, the amount of traffic your family brings through, and the material of the walls themselves. If you want to transform your home with a paint finish that stays beautiful for years to come, we can help. Reach out to Modern Builders of America today to schedule a free in-home estimate at /contact, and let our team of experienced craftsmen handle the details.